This introduction will lead through Portmaster and show you all the basic features and how you can best use them to protect your privacy. In case you feel already familiar, but are looking for some specific guidance then the GettingStarted guide is the place to go.
Make sure you have followed the instructions for the installation properly, including the restart of your machine before starting here!
¶ The Interface
¶ First Startup
When you open Portmaster for the first time, you are greeted by the introduction screens, which give you the absolute basics - filter lists and Secure DNS - which we will cover here a bit later, but in much greater detail.
¶ Interface Overview
After that, you immediately presented with the Network Monitor, where you can see all your connections. Before we hop into that in the next section, let's cover some basics first.

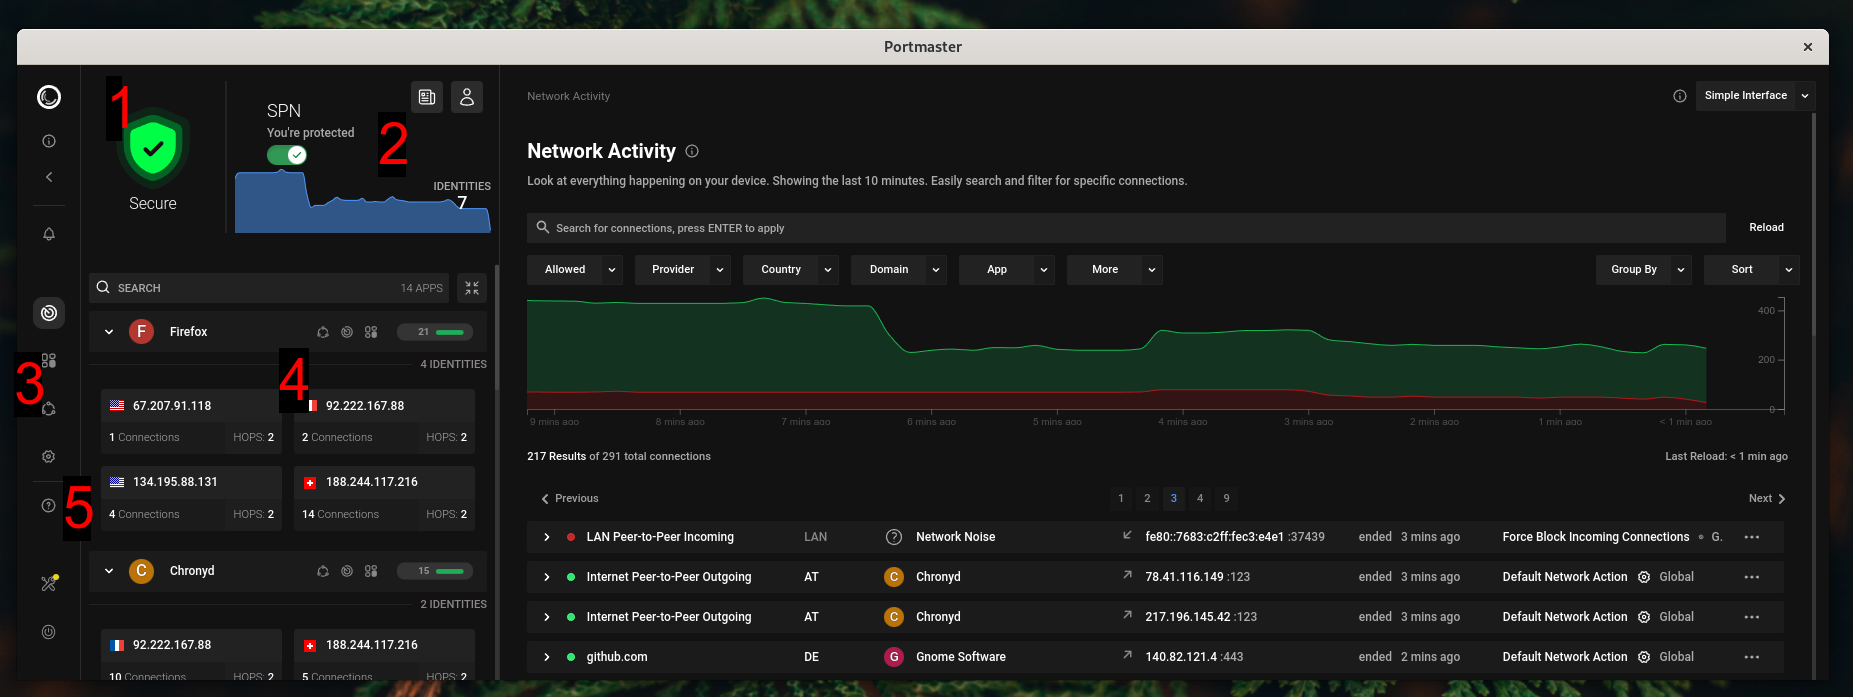
¶ 1. Shield
On the top left, there is a colored shield that will have one of three colors:
- Green: Everything is working correctly and you are protected.
- Yellow: Something unusual is going on, but no need to panic yet. See the notifications for details.
- Red: Panic. Your privacy protection may be broken and your immediate attention is required. See the notifications for details.
¶ 2. Safing Privacy Network (SPN)
The SPN provides protection for your Internet connections superior to any VPN. It is Portmaster's most important additional feature. Find out more about it on our website.
¶ 3. Navigation Bar
The left-most bar lets you quickly access different functionality as well as switch between different pages of the Interface:
- 3.1. Info Pop-ups: Clicking these icons provides you with more information about an element. Can also start a tour through the Interface.
- 3.2. Collapsing: Collapse the Side-Dash if you need more screen space.
- 3.3. Notifications: View and interact with notifications.
- 3.4. Prompts: Respond to connection prompts, if enabled.
- 3.5. Menu: Open the pages Network Activity, Apps, SPN, Global Settings and Get Help.
- 3.6. Tools: View Portmaster's version and download updates, among other things.
- 3.7. Power: Shutdown or restart Portmaster.
¶ 4. Side-Dash
The Side-Dash gives you an instant overview of the active apps on your device. It shows a number for how many connections an app recently had and a green bar for the fraction of how many of them were allowed.
If you are using the SPN, the Side-Dash will also show you which identities the app currently has on the Internet.
Clicking an app will show all of its connections and allow you to change settings just for this app.
¶ 5. Get Help Page
If you are ever stuck, the first place to go to is the "Get Help" page.
You can get there by clicking the in the Navigation Bar.
There, you can quickly search the frequently asked questions and easily report any bugs you've encountered.
¶ Network Activity

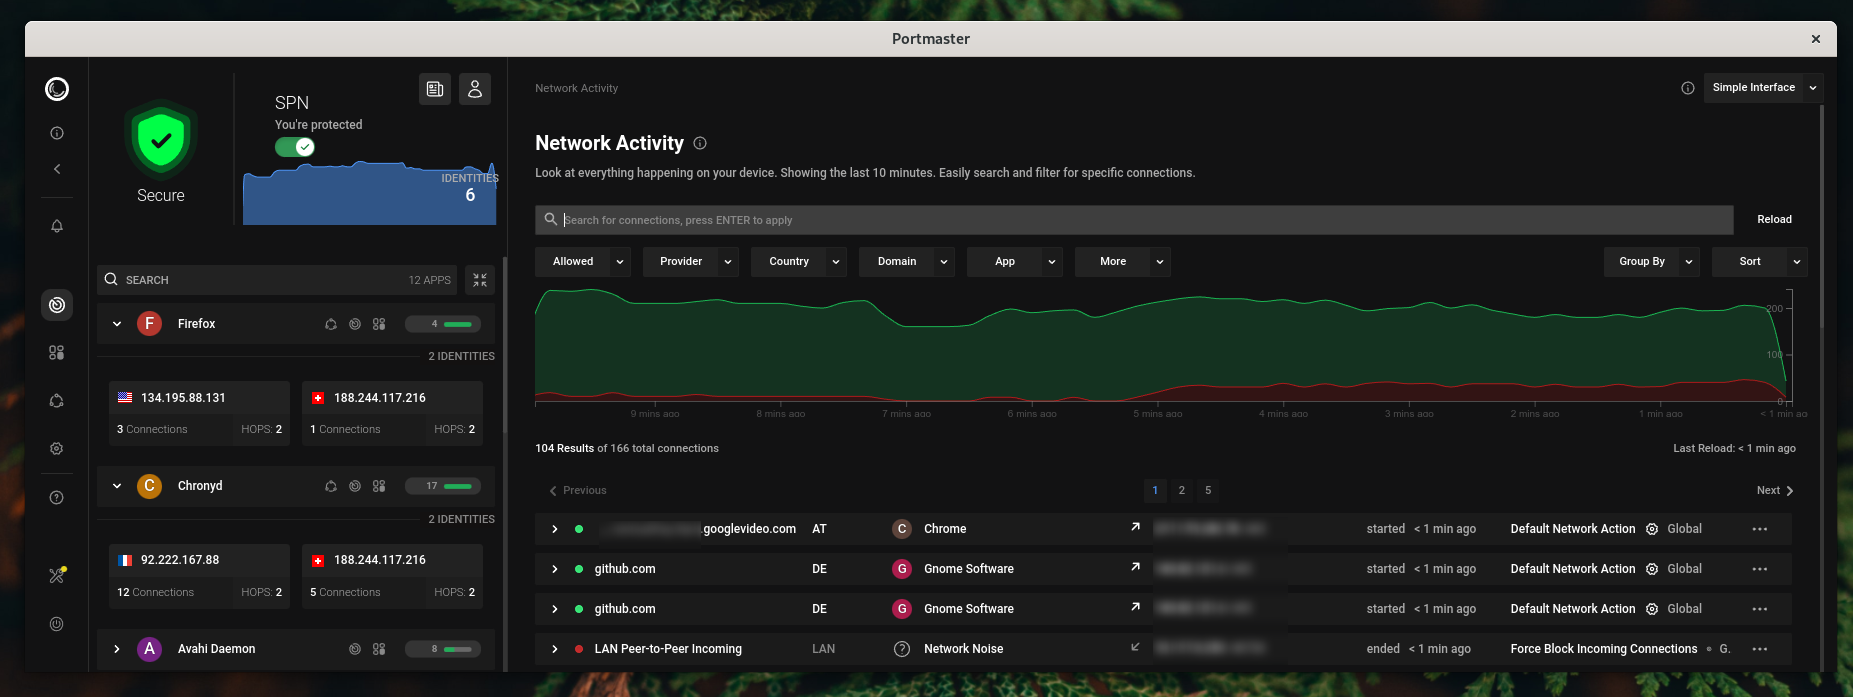
The Network Activity - the initial view when you open Portmaster - shows you all recent connections of your device.
The dots at the beginning of each row are colored according to the decision:
- Green: Connection was allowed.
- Red: Connection was blocked.
- Yellow: There was an error handling the connection and it was blocked.
¶ 1. Investigating
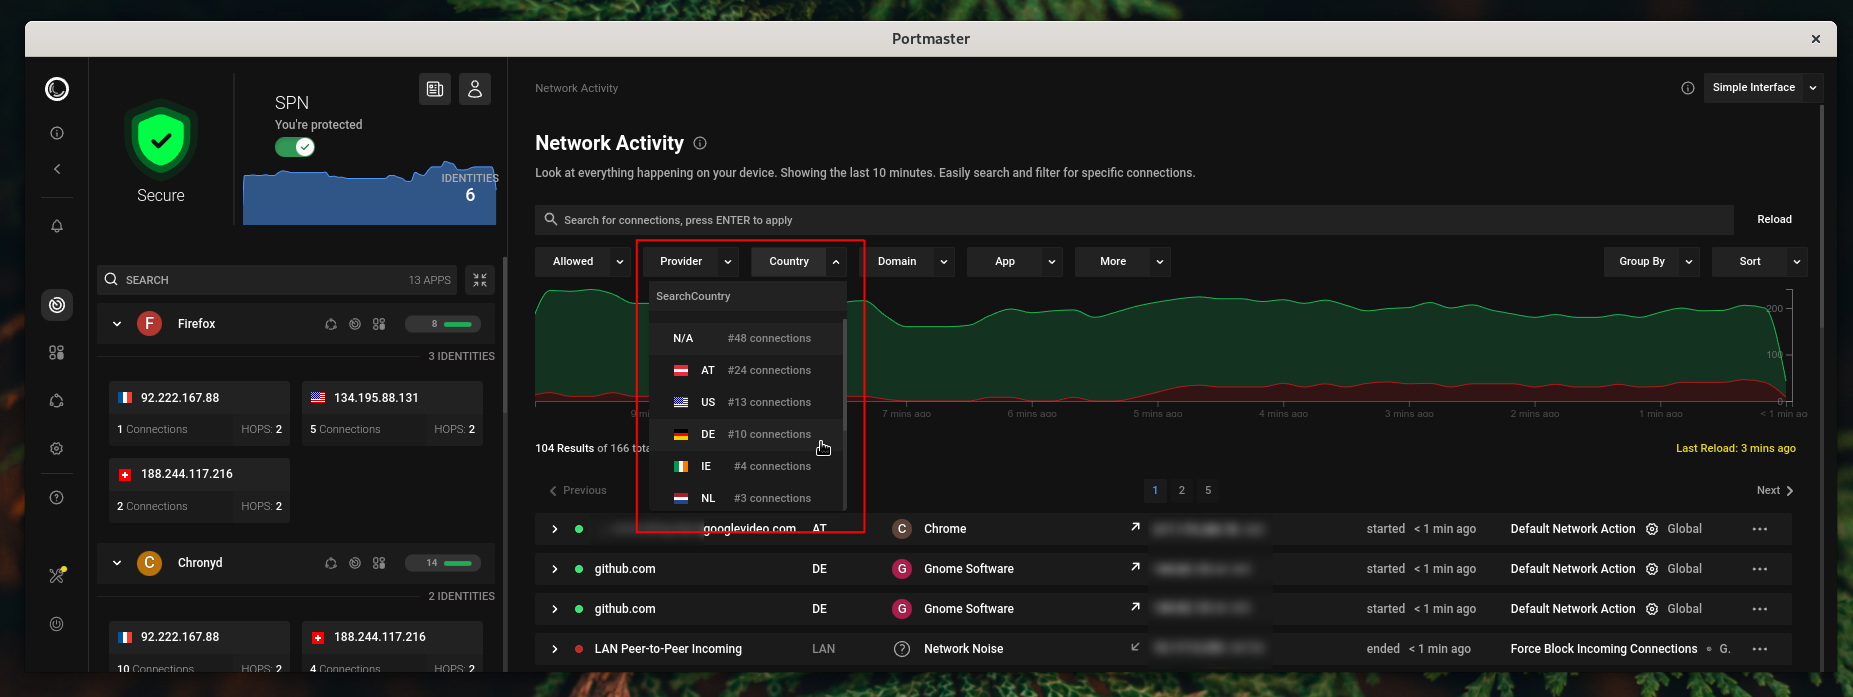
Using the search bar, you can easily search for connections. When you start typing, it will suggest different options and categories you can search in. If you apply filter, it will be displayed as a tag above the search bar.
Instead of searching, you can also use the drop-down menus to quickly select common filters.

You can always copy the current search and share it with others. They can then paste the query into their search bar to apply the same filters and search terms.
Pro Tip: If you hold "Shift", a dotted line will appear under various information. If you click any of these, they will be added to the search filter.
¶ 2. Birds-Eye View
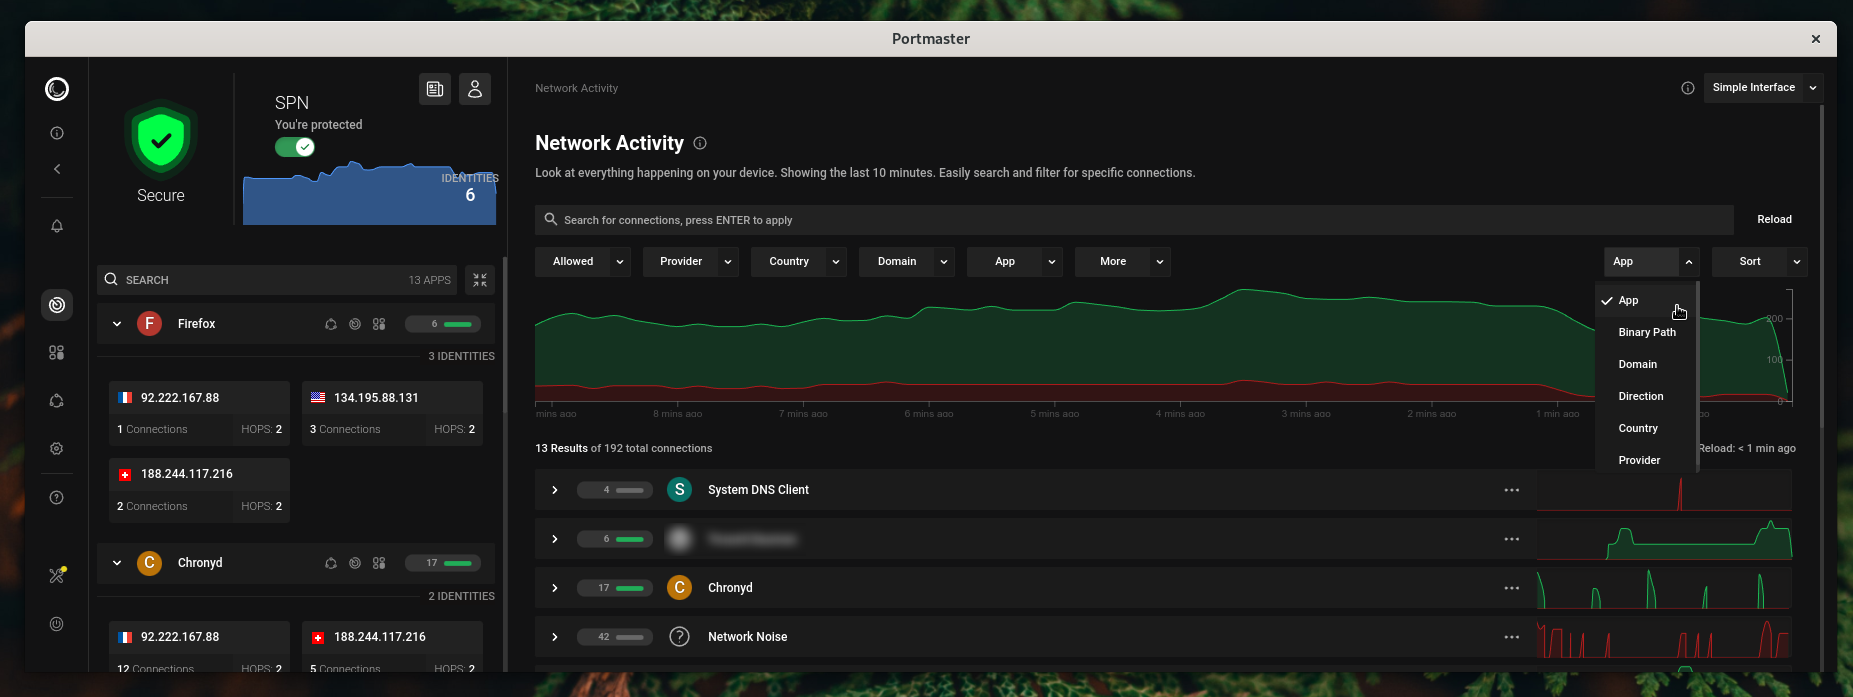
Sometimes you might not be searching for an individual connection, but trying to get an overview and a general feel for what is going on. To do that, simply select one or more attributes to group connections by for a birds-eye view.
Every group shows a small graph to the right to let you quickly see what is going on in this group. If intrigued, simply click the row to open the group and see the individual connections in it.

¶ 3. Connection Details
If you've found a connection you are interested in, you can click the row to expand it and show a lot more details about the connection.
Possibly the most important information is why the connection was allowed or blocked. Look for the Reason.

Once you know why it was blocked, you will want to know which setting was responsible for it. Just next to the Reason, you will the Applied Setting.
Using the buttons at the bottom of the connection details, you can then easily:
- Block the connection if it was allowed.
- Allow the connection if it was blocked (but not force blocked).
- Go to the responsible setting in the app: App Setting
- Go to the responsible setting in the global settings: Global Setting
These buttons will help you to quickly take action on a connection.
¶ Global Settings
This page gives you access to the global settings. Here, you can find every setting of Portmaster nicely put into categories. Don't want to scroll? Search.
Some of these settings configure Portmaster itself, others define the default for all Apps - as long as they are not configured differently. If you are unsure what a setting does or if it's set correctly, you can always revert to the default.
You can also find all settings explained in the [Settings Handbook]({{ site.portmaster_settings_url }}).
¶ Apps and Profiles
The apps page lists all programs and apps that Portmaster has seen doing something on the network, like connecting to the Internet. If an app does not show up here, it probably has never used the network since Portmaster was installed.
Selecting any app will bring you the this app's view: The network activity, settings and details, all scoped on the selected app only. The summary of the information in there is sometimes also called a "profile".
Editing any setting will override the globally set default for this setting for this app. Some settings - most notably, any kind of rules - stack upon the global rules instead of replacing them completely. These are marked clearly.
If you have uninstalled an app and do not require it in Portmaster anymore, you can simply delete it from the "Details" tab of the app.
There are also two special apps, that do not represent an app per-se:
¶ Network Noise
This app does not really exist, but it's simply a profile that Portmaster uses to group all incoming connections to your device, that no app was waiting for.
Generally, you can ignore this app, but it might be interesting to look what into it to see what is going on in your network.
¶ Other Connections
In some rather rare cases, it can happen that Portmaster is unable to determine which app a connection belongs to. Then, the connection is put into "Other Connections".
¶ SPN Map
This page might well have the most eye-candy of all. With the SPN enabled, you get to see all the places you are on the Internet - at the same time. This really a show-off of what the SPN is capable of and how it protects your privacy.
The map shows all the locations of the SPN's servers and highlights used ones. If you click on the "Hops" of one of the Identities in the Side-Dash, the map will hightlight the route these connections have taken.
If you are intersted in a server, you can click it on the map and there will be more details about it in the top left.
¶ Feature: Secure DNS
¶ Feature: Filter Lists
¶ Feature: Force Blocks & Rules
¶ Feature: Connection Prompting
¶ Feature: Exit App in a country
¶ Feature: Enable / Disable SPN for one app
¶ Feature: Exclude domain from SPN
¶ Feature: Account Creating, Payment & Login in PM
Pay with cash? (partner in crime accepts immediately)
Video only?
¶ PS: For the Techies
If you are experienced in IT, you might fancy more details. For this, you can simply change the {% include setting/ref.html key="core/expertiseLevel" %} to fit your needs.